HubSpot has a number of default fields that you can set on a blog post (the author, date, content, tags/topics... etc.) but, did you know you can create custom fields on a blog post that can be pulled through to the listings area?
This post, for example, uses a "Difficulty" field to generate the above textbox and also add a tag to the post on the listings page.
Example: content type
Let's say, for example, that we want to specify a content type on our blog post (video, infographic, tutorial... etc.) so that we can display the content differently on the listing page (e.g. the content type and an icon next to it).
Add the custom field to the post template
On the post template, you can use HubL modules to create your fields. For example, for the above content type I could use a Choice module, like this:
{% raw %}{% choice "blog_type" label='Choose the Blog type', value='Text', choices='Text, Video, Infographic, Whitepaper, Podcast', export_to_template_context=True %}
"choice" describes the module type, the "label" is what the user will see in the post, the "value" is the default option on the dropdown, the "choices" are the options that the user will see and "export_to_template_context" makes the parameters available in the template context.
In my template, I added this to the very top of the "Post template" code:

And on the user's side, it will be available in the "Modules" section on the sidebar:
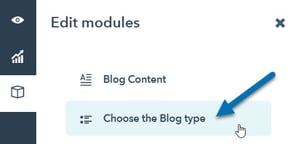
Where they can click into it and set the type:
.jpg?width=300&name=Custom%20post%20fields%20on%20HubSpot%20-%20front-end%20(2).jpg)
Using the custom field on the post
In the "Listing template" section you can add a snippet that will show your choice above by using the following code:
{{ content.widgets.blog_type.body.value }}
In my particular example, I first used a Conditional to set the Font Awesome icon based on the selected value:
{# Set Font Awesome Icons #}
{% if content.widgets.blog_type.body.value == 'Video' %}
  {% set icon = 'fa-play' %}
{% elif content.widgets.blog_type.body.value == 'Infographic' %}
  {% set icon = 'fa-chart-line' %}
{% elif content.widgets.blog_type.body.value == 'Whitepaper' %}
  {% set icon = 'fa-file-download' %}
{% elif content.widgets.blog_type.body.value == 'Podcast' %}
  {% set icon = 'fa-podcast' %}
{% endif %}
And then used that icon type for my post code:
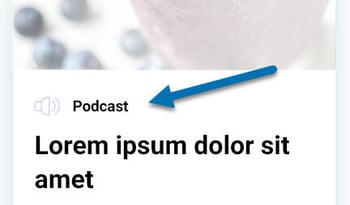
<div class="blog-post__type {{ content.widgets.blog_type.body.value|lower }}"><i class="fas {{ icon }}"></i> {{ content.widgets.blog_type.body.value }}</div>
This looks something like this on the front-end:
How do I know what code to use?
You can use the "Developer Info" tools on your HubSpot page (see below) to see all of the custom properties on your page.
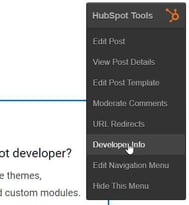
From there, you can use dot notation to work down through the JSON tree. More details on this can be found here.
Other examples
Some other examples of custom fields that I've used in the past can be found below.
Choose whether to display a form on your blog post
Sometimes a marketer might want to add a form to their blog post. You can add a boolean module which asks if they want to display a form and, if the form should be displayed, a small content area for a a title and description and a form module:
{# Lead Capture Form #}
{% boolean "enable_form" label='Enable Lead Capture Form?', value=False, no_wrapper=True, export_to_template_context=True %}
{% if widget_data.enable_form.value %}
  <div class="lead-capture">
    <div class="lead-capture__content">
    {% rich_text "form-description" label="Lead Capture Form Description" html='<div>Lorem ipsum dolor sit amet mollis velit vitae fringilla suscipit. Ut sapien dui, molestie id malesuada quis, accumsan et nunc.</div>' %}
    </div>
    <div class="lead-capture__form">
    {% form "form" label="Lead Capture Form" form_to_use='123456789-123a-4567-9d89403j78fd' %}
    </div>
  </div>
{% endif %}
Event information (date, time, location... etc.)
Sometimes marketers might want to use their blog to display event information. In this example, I added the following to display the date/time and location on the Post template section:
<p class="date-and-location">
<strong>Date & Time:</strong> {% text "date" label="Date & Time" value='Month DD, YYYY at H:MM - H:MM', no_wrapper=True, overrideable=True %}<br>
<strong>Location:</strong> {% text "location" label="Location" value='Venue - Street Name and Number, City, State, Postal Code', no_wrapper=True, overrideable=True %}
</p>
And the following to pull through the date/time and location information to the Listing template section:
<p>
<strong>Date & Time:</strong> {{ content.widgets.date.body.value}}<br>
<strong>Location:</strong> {{ content.widgets.location.body.value}}
</p>